Above Ground Swimming Pool Liner Installation Tips for Overlap Liners
When you’re doing an above ground pool liner installation with an overlap liner there are certain guidelines to follow and tricks to make the job successful. LinerWorld has put together these above ground pool liner installation tips to help you when you install an overlap swimming pool liner.
Before Buying a Pool Liner Replacement:
Measure your swimming pool before installing and even ordering the pool liner replacement. You want to make sure that you have the correct sized pool liner for your above-ground swimming pool.

Follow These Above Ground Swimming Pool Liner Installation Tips for Overlap Liners:
-
- Drain the water completely out of your swimming pool. Be careful, when the water is drained out of the swimming pool, the walls are unsteady. Your above-ground pool may cave in if strong winds come through when it is empty. The walls may also cave in if your pool is surrounded by thick rocks when it is empty. For your safety, please keep these conditions in mind when you drain your swimming pool.
- Cut the old liner out of the pool, but leave a small strip of the pool liner around the top circumference of the pool. This portion of the old swimming pool liner will be removed a little later.
- W
 hen the old pool liner is removed, look at the swimming pool floor. Remove any hazardous items — like rocks, roots, or any other sharp or hard objects — that could harm the new overlap pool liner. Add more sand if you need to flatten it out. When using padding at the bottom of your swimming pool, make sure that nothing will puncture the liner pad when it is being walked on. The ground can shift so rocks become a threat, so you want to remove these by cutting them out from under the liner pad and then use duct tape to fix the hole in the pad. (Please remember to make as small of an incision as possible; the duct tape will protect the padding from tearing any further.)
  At this point, you will need to make sure the cutouts in the swimming pool wall for the skimmer box and return jet are still in good condition. If you notice rust, use a rust preventive spray to protect the wall of your above-ground pool. Paint may also help in preventing rust. Make sure that you completely sand the existing rust away. Make sure that there is no residue in the above-ground pool where the liner is going to sit.
- Take the overlap pool liner out of the box. Be careful not to puncture the liner while opening the box if you are using a knife. Try to unfold the pool liner in your yard so you can inspect it; making sure there aren’t any defects, like holes in the liner or seam, pattern problems, etc. Also, be sure to check that the swimming pool liner is the right size, the size is usually stated on the box.
- Place the overlap pool liner in your above-ground swimming pool. Carefully place the swimming pool liner in the pool by lifting it over the above-ground pool wall and gently placing the liner on the pool floor.
- While you are installing the overlap pool liner, take off your shoes. Being barefoot or in socks will protect the pool liner from tears and damage during installation.
- Unroll the overlap pool liner and place it into position. The bottom seam of the pool liner should follow the bottom corners of your above-ground pool. As much as possible, keep this at an equal distance. Some swimming pools are not completely round or oval, so try to make it as even as possible. Once you have completed this, make the pool liner as smooth as possible on the bottom of your above-ground pool.
 Begin at the wall seam of your above-ground pool, remove 3 (or so) top rails, copings, and the remaining section of the old swimming pool liner. Install the new overlap pool liner by securing it with the old (or new) coping, or a clothespin. This will hold the overlap pool liner in place. Then skipping every couple of rails, repeat this until the entire swimming pool liner has overlapped the pool. The liner will be loose, so be careful not to rip the pool liner at these parts.
- Smooth out the swimming pool liner so that all the wrinkles are removed.
- Gently begin adding some water into the above-ground pool. You can still remove any remaining wrinkles out of the overlap pool liner as the water slowly fills the pool. Smooth out the wrinkles in a straight line, beginning at the center of your above-ground pool and moving outward toward the edges. By slowly adding the water to your pool removing any wrinkles will be easier because the overlap pool liner will not be too stiff.
- As the water is filling, you may need to take some excess overlap pool liner over the wall of your above-ground swimming pool. This will remove more wrinkles and will allow the swimming pool liner to fit better. Do this with caution so you do not rip the new overlap pool liner.
- The final adjustments to the swimming pool liner will come when the water level reaches 6 inches. At this point, you will want to pull any excess overlap pool liner over the wall and secure it with the coping. This is the time to work out the remaining wrinkles in the wall. If you don’t, these wrinkles will remain on the wall of your above-ground pool when the water fills up. When all the coping pieces are installed (and every section of the swimming pool liner is tight) you can install the metal stabilizers, if the pool has them. Then place the top rails back on the walls in each section of your above-ground pool.
- Fill the above-ground pool until the water reaches a couple of inches below any section you need to cut the overlap swimming pool liner; such as for the skimmer and return, or any lights you may have in your above-ground pool.
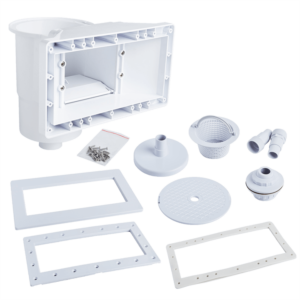
- Now you will install the skimmer box and return, and/or pool lights, onto the wall of your swimming pool. You do not want to cut these holes in the overlap pool liner until these are bolted into the above-ground pool. This will make the installation job more effective because it will give the overlap pool liner a longer life. It is usually suggested to replace the skimmer and return gaskets every time you replace your pool liner before you install the respecting parts.
- Now you can carefully cut the overlap pool liner following the inside of the faceplate. You may need to cut a hole for the return before installing it. If you need to, remember to cut the hole carefully using a sharp razor-like tool. If any of these cutouts are too big, the gasket will not be able to cover them and your above-ground pool will leak. There is no way to fix this so be extremely careful; otherwise, you will need to install another new liner!
- Continue to fill the pool. Be sure to check for swimming pool leaks. If need be, tighten the skimmer and return, or any lights, if you see any leaks.
Hopefully, this guide helps you install your overlap liner quickly, efficiently, and safely so you can get back to enjoying your pool. If you still need to purchase a swimming pool liner or you have more questions about how to install a pool liner, we’ve got you covered!


