

How To Patch An Above Ground Pool Liner
Wear and tear on your pool liner is expected during the busy summer months. Even if you’re extra careful, holes, tears, and leaks can still happen. If your liner did get damaged, a patch kit can help keep the fun alive.
Patch kits are often the first step if you notice leaks or tears. Patching your above ground pool liner can extend its lifespan and prevent water leakage. They’re much cheaper and easier to install than a complete replacement liner, so they work well in an emergency or while you’re waiting for a new pool liner to arrive.
Here’s a list of materials and a step-by-step guide on how to patch a pool liner.
Materials You’ll Need:
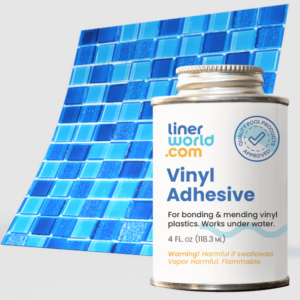
- Pool liner patch kit (Try our Perfect Patch Vinyl Repair Kit)
- Goggles
- Scissors
- Clean cloth or sponge
- Pool net/skimmer
Step-by-Step Guide:
Once you’ve gathered all the materials, you’re ready to get started with the patch kit repair.
Gather Supplies & Read All Instructions
We always recommend you take a few minutes to gather supplies and review all instructions before starting the patch application process.
Safety and timing are pa
ramount, so being on the ball with things is good. Plus, every vinyl patch kit is a bit different, so it’s best to start off with all the details rather than assuming you know what you’re doing.
Locate the Leak or Damaged Area
Grab your goggles and use your eyes and ears to identify the general area of the leak. Sometimes, this is easier said than done, especially if the liner design helps mask rips and imperfections.
Check out these leak detection resources for more helpful tips:
Once you’ve found the source, you can determine whether or not using the patch kit is a good idea. Some things to consider include:
- The extent of the damage. The larger the hole or tear, the harder it will be to repair using a patch kit successfully.
- The location of the damage. If the rip or tear is near the ladder or skimmer, you may have a more challenging time patching it — and the patch may be less likely to last. If you have a hole in a seam, we highly recommend replacing the liner. Seam holes and separations can spread with water pressure and use of the pool.
- The
age of the liner. Older liners tend to fade and start to wear out. If your liner is over a few years old, buying a replacement liner might be a better use of your time and money.
Prepare & Clean the Liner Area
To give the adhesive the best chance of sticking, you will want to clean the pool water and the area on the liner you’ll be working on.
Start by skimming off leaves, bugs, and other debris that found a way into your pool so the water is as clean as possible.
Then, use a cloth to gently wipe around the damaged area. Avoid scrubbing the area or using a lot of pressure, which can make the issue worse or cause more rips. Lightly wiping the area should be enough to remove any oils or residue that may impact the adhesive.
Prepare & Cut the Patch
Our Perfect Patch kit comes with a 2-foot by 2-foot vinyl sample that can be cut for multiple patches, and also includes a 4 ounce can of glue. Be gentle and cautious to avoid accidentally ripping or poking holes in the patch.
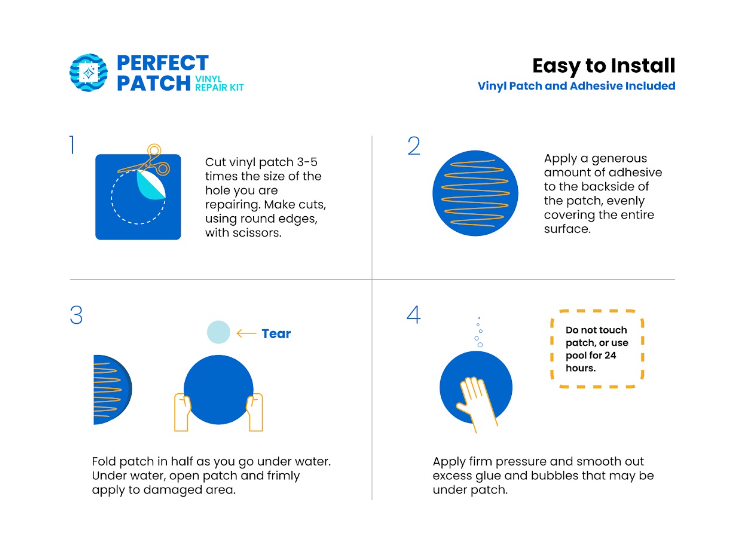
To avoid mistakes and potential waste, measure and mark the patch to make sure it’s the appropriate size. Cut the vinyl patch 3-5 times the size of the hole you are repairing. Make cuts using round edges, with scissors.
Apply Adhesive
Apply generous amount of glue to patch only, evenly covering the entire surface
Apply the Patch
Carefully place the patch over the marked area, ensuring it lines up correctly and covers the entire area. Press down firmly to ensure good adhesion and smooth out wrinkles or air bubbles.
The patches will stick under or above the water line. Don’t drain your pool; you may risk damaging the liner even more.
Apply Pressure
Using your hands, gently apply pressure over the patch. This helps the adhesive bond securely to the liner. Apply pressure for about two minutes, or until the patch is secure.
Inspect & Monitor the Area
Once the adhesive has dried, monitor the patch area for any signs of leakage. While a well-done patch can last many years, it’s good practice to inspect it periodically for any signs of wear or additional leaks.
Keep an eye on the water level in your pool over the next few days and look for signs of leaks, such as puddles or wet areas around the pool or an increase in algae growth.
Need a Pool Liner Replacement?
If the damage to your pool liner is extensive or the patch isn’t holding up, consider replacing the liner to ensure the safety and functionality of your pool. If you need a new liner, don’t fret. LinerWorld has a wide selection of unique pool liners in all sorts of colors and patterns!
