


How to Open Your Above Ground Pool in 14 Easy Steps
Updated: April 30, 2025
After a long, cold winter, there’s nothing better than taking that first swim or lounging by your above ground pool on a warm, sunny day. If daytime temperatures are consistently hitting 70 degrees or higher, it’s officially time to open your above ground pool and kick off the swim season!
Opening your pool might seem like a big job, but with the right steps and a little preparation, getting your above ground pool ready for summer can be quick and easy. A smooth pool opening helps protect your liner, keeps water balanced, and saves you time and money in the long run.
In this guide, we’ll walk you through the basics of how to open your above ground pool properly — along with expert tips and tricks to make the process faster, easier, and stress-free. Let’s dive in and get your pool summer-ready!
1. Prepare the area around your pool.
Start the pool opening process by giving the area around your pool a good once over. Make sure it is safe and easily accessible.
- Remove tripping hazards like rocks, leaves, and branches on the ground around the pool.
- Trim any shrubs or branches that may get in the way or cause debris to fall in the pool.
- Pick up any tools, toys, lawn ornaments, and other items that may get damaged or cause you to trip.
- Note any power lines, pipes, and wiring above or buried in your yard and follow proper safety precautions.
All clear? Then you’re good to go!
PS: While we’re on the subject of pool safety, be sure to check out our handy pool safety guide for other important tips to keep you safe around the pool this summer!
2. Inspect your pool equipment and chemicals.
 Once your yard and pool area are in tip-top shape, you can move on to your pool equipment and supplies. Make sure there was no damage to your pool pump or filter system, or your other equipment, throughout the winter or while in storage and that everything is ready to go.
- Check equipment for cracks, rust, dirt, and exposed wires.
- Make sure any small parts and pieces are accounted for, like bolts and screws.
- Clean and repair equipment as necessary.
- Replace any damaged equipment as necessary.
Don’t forget to check your pool chemicals, too. You’ll want chlorine tablets, pool shock, Pool pH Up and/or pH Down, and test strips or a test kit ready to go.
- Check all expiration dates.
- Replace any outdated chemicals.
- Check bottles for leaks or damage (to avoid spills and chemical burns during use).
Since you’re checking the label anyway, it doesn’t hurt to give the instructions another read too (just to make sure you’re following proper handling, safety, and storage guidelines).
Shop Now
Sand Filter Tank Cover
Hose & Fitting Kits
3. Remove, clean, and store your pool cover.
 Now the fun really begins! It’s time to clean and remove your pool cover!
You’ll need to get as much dirty water and debris off of the pool cover as possible before removing it. A cover pump is a fast and efficient way to remove water since it will do the majority of the work for you. Otherwise, you can spend time bailing the water with a bucket or siphoning it with a hose.
Pro tip: Take your time with this step and get your cover as clean as possible. The less dirty water and debris that falls in your pool, the less you’ll have to clean out later.
After it’s cleared off, you can remove the cover slowly and carefully. Winter covers can be heavy and cumbersome, so you’ll probably want to enlist the help of a family member or friend at this point.
- Spread your cover out in a dry area, like the driveway, patio, or grass.
- Use a hose and a push broom or pool brush to clean any remaining dirt and debris.
You’ll want to let the cover fully dry before putting it in storage. It may help to use talcum powder and store the cover in a sealed container to avoid mold, mildew, and damage from critters throughout the summer.
If you’re using a winter pool pillow, you should deflate, clean, and store that with your pool cover.
Shop Now:
Rhino Pool Covers (Round)
Gorilla Pool Cover (Round)
Rhino Pool Covers (Oval)
Gorilla Pool Cover (Oval)
4. Check your pool liner for leaks and damage.
Now that the swimming pool is uncovered, you’ll have a good idea what is underneath. Old Man Winter may have taken a toll on your pool, so you’ll want to inspect your pool liner closely before you spend time completing the pool opening process.
Look for signs of leaks, including:
- Low water levels
- Standing water around your pool
- Noticeable rips and tears in the liner
- Cracked or loose tiles/structural damage
Warning: If you do have a leak, you’ll either need to repair or replace your liner before moving forward.
If you need a new pool liner this summer, we’ve got you covered. Be sure to check out our full selection of bold, colorful liners…

5. Remove winter pool plugs.
Now you can go ahead and remove any winterizing pool plugs. Check all openings, including return jets (eyeball fittings) and the skimmer bucket. If you used an ice compensator in your skimmer bucket or a skimmer cover, you can remove those too.
After plugs are removed, reinstall your skimmer baskets and return jets to the return line.
Shop Now:
Widemouth Deluxe Skimmer Box & Return Kit
Square Deluxe Skimmer Box & Return Kit
6. Add water to your pool (if needed).
Sometimes your water level may get a little low during winter. You can use your garden hose to fill the pool.
Pools operate best when the water level is at approximately the middle of the skimmer opening. If the water level is too high, the water can move too slowly into the skimmer, resulting in debris getting through and accumulating in the pool. If the water level is too low, it may start to suck in air instead of water and potentially burn out your pump.
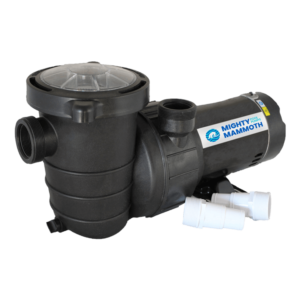
7. Reinstall your pump, filter, and other equipment.
Now it’s time to get your pool equipment back up and running! Go ahead and hook up your:
- Skimmer basket
- Pump
- Filter
- Booster pump
- Spa equipment
- Heater
If you’re a pool veteran, you may already have this step down pat. However, there’s no shame if you need a little refresher. Check your owner’s manual or consult a professional for specific set up instructions.
8. Reinstall your deck accessories.
After you’ve installed your electrical components, you can move on to the pool ladder, pool stairs, diving board, slides, and deck fittings.
When connecting stairs, ladders, and diving boards, be sure you have (and connect) all the grounding wires or straps. These are important for securing these accessories properly, but often become lost or damaged during the pool closing process.
Pro tip: You can lubricate bolts on ladders, dive boards, stairs, and rails to prevent rusting and make them easier to remove when closing the pool during the winter months.
Remember, these items see a lot of traffic throughout the summer, so it’s important that they’re installed correctly. Don’t hesitate to double-check your instruction manual or reach out to a pool expert for assistance.
Shop Now:
Pool Ladder Pad
9. Turn on the power to your pool system.
Now you can go ahead and turn your equipment back on! If everything starts and seems to be working correctly, you’re in good shape!
If the system doesn’t seem to be working properly, it may mean you need to prime your pump. Easy enough! To prime the pump, simply:
- Shut off your filter system
- Remove the pump lid
- Add water with your garden hose or use a bucket of pool water.
- Replace the lid and start the filter.
Depending on what type of pool filter you have, you may need to add more sand or DE powder and backwash your filter thoroughly too.
 10. Clean your pool.
Despite your best efforts, some debris probably made it into the pool while removing the cover and installing equipment. No worries! It happens to the best of us! You’ll just need to take a few minutes to clean your pool.
- Use a leaf rake or net to scoop out large debris, like leaves and twigs.
- Use a pool vacuum or automatic pool cleaner to tackle dirt, sand, and small debris.
11. Shock your pool.
You’re almost done! All that’s left is getting your water chemistry where it needs to be for swimming. After the winter months, you’ll want to shock your pool.
Pool shock comes in both liquid or granular forms. Add enough shock to raise the chlorine level of the pool to about 3.0 ppm, or approximately:
- 2 pounds of a granular shock for every 10,000 gallons of water
- 2.5 gallons of a liquid shock for every 10,000 gallons of water
Use caution and follow instructions when handling such a high concentration of chemicals.
Pro tip: If you’re using a granular shock, mix it in a bucket and add the mixture to the skimmer while the pool is running. If you add it directly to the pool water, you may risk bleaching or staining your pool liner.
12. Test your pool chemistry.
You’ll want to check your water frequently the first day you open the pool. After letting the system run for several hours, test your pool’s water chemistry using a good test kit.
Ideal levels are:
- Chlorine: 1.0-2.0 ppm
- pH: 7.2-7.8
- Calcium Hardness: 180-220 ppm
- Alkalinity: 80-120 ppm
- Dissolved solids: below 5000 ppm
- Cyanuric Acid: 40-80 ppm
- Chloramine: Below 0.4 ppm
Warning: Let the water filter for a full 24 hours to normalize before swimming.
Remember, a lot of things impact the water chemistry of your pool, including rain, swimmers, and debris, so you should continue to check your water regularly throughout the summer.
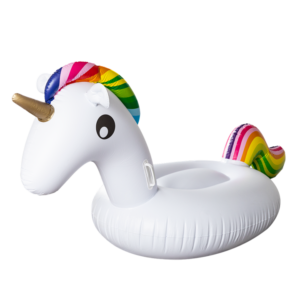 13. Pull out your pool floats and toys.
As you wait 24 hours for the water levels to normalize, it’s a great time to pull out your pool toys, pool floats, and patio furniture from storage. It’s a good idea to clean your pool toys and floats before putting them in the water.
Shop Now:
Swan Float
Unicorn Float
Giant Unicorn Boat
Dive Sticks
Water Hammock
14. Enjoy your pool!
Test your water one more time before swimming for the first time. If all looks good, you and your family can dive in and enjoy!
If you have questions about opening your pool, our team is always here to help — just leave a comment below and check out these helpful resources to keep your pool up and running all summer long!
